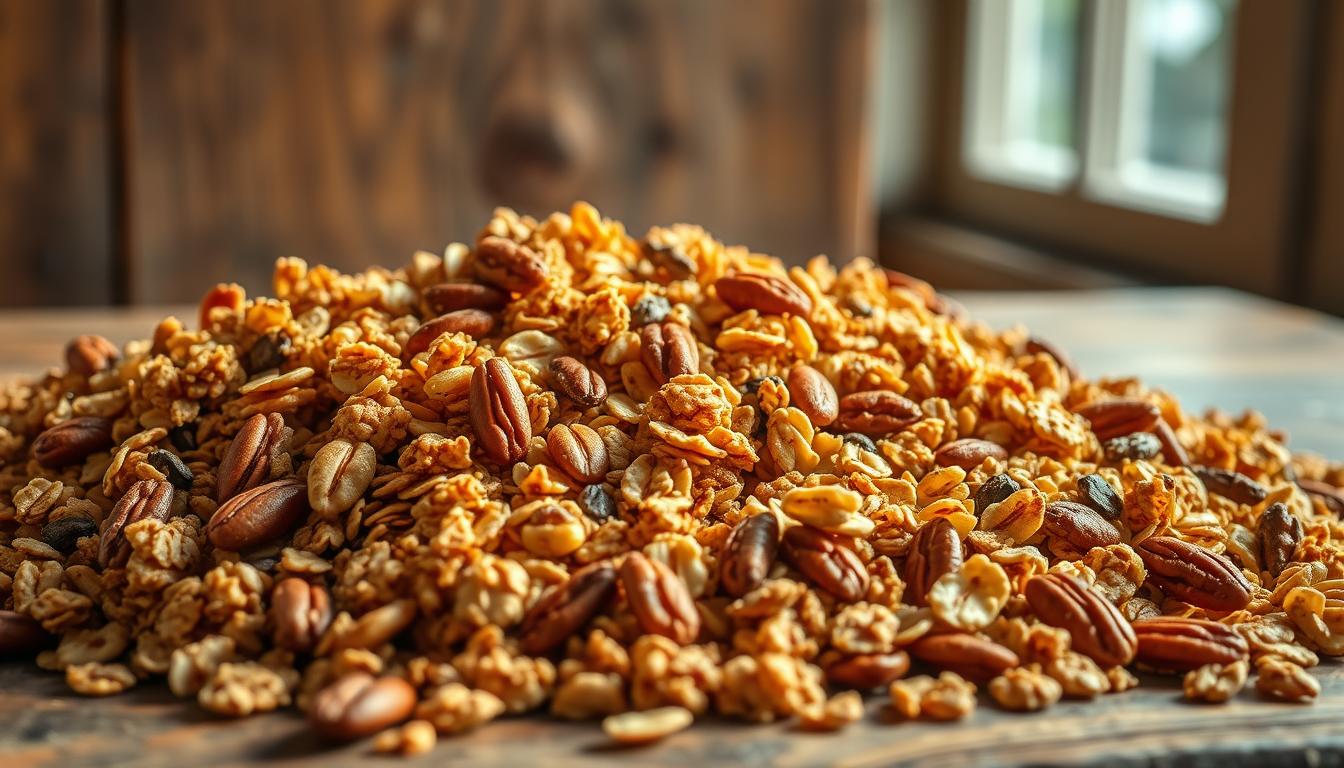
Vanilla Nut Granola Recipe for a Crunchy Snack
Every morning, I used to struggle with bland breakfast options. Then, I found a homemade vanilla nut granola recipe that changed everything. It’s not just a meal; it’s a crunchy, aromatic experience that connects you with real, wholesome ingredients.
Granola has been a favorite snack for decades. Making your own allows you to control every ingredient. This ensures a nutritious and delicious start to your day. The mix of old-fashioned rolled oats, nuts, and vanilla creates a breakfast masterpiece that beats any store-bought option.
Whether you’re busy, health-conscious, or just love delicious food, this vanilla nut granola recipe is for you. It’s more than just a recipe; it’s a journey into creating something special in your own kitchen.
Table of Contents
Key Takeaways
- Discover a simple, customizable homemade granola recipe
- Learn how to create a nutritious breakfast option
- Explore the versatility of granola ingredients
- Understand the health benefits of making your own snack
- Master the art of creating crunchy, flavorful granola clusters
Why Make Homemade Vanilla Nut Granola
Making your own granola at home is a world of tasty adventures. Homemade granola beats store-bought in many ways.
Health Benefits of Homemade Granola
By making gluten-free granola, you control what goes into it. Store-bought granolas often hide sugars and additives. Making it yourself lets you:
- Lower sugar levels
- Choose organic, quality ingredients
- Adjust nutritional content
- Steer clear of artificial preservatives
Cost-Effective Alternative to Store-Bought
Homemade crunchy granola is also budget-friendly. Here’s why:
| Homemade Granola | Store-Bought Granola |
|---|---|
| $0.50 per serving | $2.50-$4.00 per serving |
| Customizable ingredients | Fixed ingredient list |
| Bulk preparation possible | Limited bulk savings |
Customization Options
Your homemade granola can be made just how you like it. Want it gluten-free? Use gluten-free oats. Need more protein? Add nuts and seeds. You can make it your own!
“Homemade granola is not just a food, it’s an expression of creativity in the kitchen.” – Culinary Enthuasiast
Essential Ingredients for Perfect Granola
Making a simple granola recipe for breakfast meal prep is all about choosing the right ingredients. These ingredients should be nutritious and taste amazing. The best granola starts with quality base ingredients that blend well together.
Your core ingredients will include:
- Old-fashioned rolled oats (1 cup or 90 grams)
- Raw nuts like pistachios (1 cup or 113 grams)
- Seeds such as hemp seeds (1 cup or 120 grams)
- Unsweetened coconut chips (1 cup or 50 grams)
- Flax meal (1 cup or 90 grams)
For binding and sweetening, you’ll need liquid ingredients. They make the granola taste better and feel right. Use 1 cup total of wet ingredients, split into:
- Refined coconut oil (1/2 cup or 100 grams)
- Honey (1/2 cup or 150 grams)
- Nut butter (3 tablespoons or 37 grams)
Adding flavor boosters can make your granola stand out. Try spices like ground cardamom (1 teaspoon) and cinnamon (1/2 teaspoon). A bit of Diamond Crystal kosher salt (1 teaspoon) will also bring out the flavors.
Your granola mix will make about 1½ quarts. This is enough for a week of breakfast meal prep. Remember, a golden ratio of 6 parts dry ingredients to 1 part wet ingredients will help you get perfect clusters every time.
Kitchen Tools and Equipment Needed
To make your easy granola recipe, you need specific kitchen tools. These tools turn simple ingredients into a tasty, crunchy snack. With the right gear, making homemade granola is easy and fun.
When making homemade granola, picking the right tools is key. It ensures your snack turns out great every time. Start your cooking journey with the essential equipment ready.
Baking Essentials
For the best homemade granola, you’ll need these baking tools:
- Large rimmed baking sheet
- Parchment paper or silicone baking mat
- Oven with reliable temperature control
- Cooling rack
Mixing and Measuring Tools
When making your easy granola recipe, precision is important. Here are the tools you’ll need:
- Large mixing bowl
- Measuring cups (dry and liquid)
- Measuring spoons
- Wooden spoon or spatula
- Digital kitchen scale (optional but recommended)
Storage Containers
Keeping your homemade granola fresh and crunchy is important. Choose containers that:
- Are completely airtight
- Have secure, tight-fitting lids
- Can hold approximately 4-6 cups of granola
- Are made of glass or BPA-free plastic
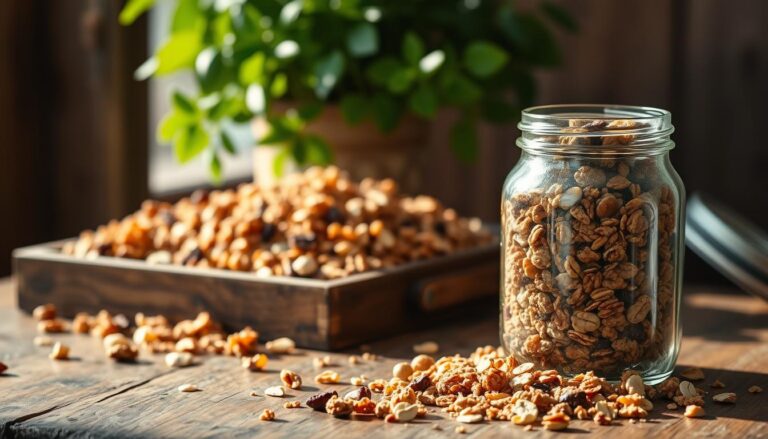
Pro tip: Mason jars and glass containers with sealed lids are perfect for storing your freshly made granola.
Vanilla Nut Granola Recipe: Step-by-Step Instructions

Making your own granola at home is simple. This vanilla nut granola recipe will show you how to make a tasty, crunchy snack. It’s great for breakfast or a quick snack.
Ingredients Preparation
First, get all your ingredients ready. You’ll need:
- 3 cups rolled oats
- 1.25 cups mixed nuts (almonds, pecans, cashews)
- ⅓ cup oil
- ¼ cup honey or maple syrup
- 1½ teaspoons vanilla extract
- Pinch of salt
- Optional: chia seeds or coconut flakes
Mixing and Baking Instructions
Here’s how to make your perfect granola:
- Preheat your oven to 300°F
- Mix dry ingredients in a large bowl
- Warm honey, oil, and vanilla in a separate pan
- Pour wet ingredients over dry ingredients
- Stir until everything is evenly coated
- Spread mixture on a baking sheet
- Bake for 20-25 minutes, stirring halfway through
Nutrition and Serving Details
| Nutritional Aspect | Per Serving |
|---|---|
| Calories | 323 |
| Total Fat | 17.2g |
| Protein | 5.7g |
| Carbohydrates | 40.5g |
Your homemade vanilla nut granola will last up to 1 month in an airtight container. Enjoy your crunchy, delicious snack!
Tips for Achieving Perfectly Crunchy Clusters
Making the ultimate crunchy granola is more than just mixing ingredients. Your easy granola recipe can become a crispy delight with a few expert tips. Let’s explore the secrets to making irresistible crunchy granola that everyone will love.
Making those perfect granola clusters is an art. It combines precise techniques and careful preparation. The secret to crunchy granola lies in three key areas: temperature control, spreading methods, and cooling.
Mastering Temperature Control
Temperature is key for crunchy granola. Set your oven to 350 degrees Fahrenheit for the best results. Pro tip: Keep the temperature steady to help clusters form properly.
- Preheat the oven completely before adding your granola
- Use an oven thermometer to ensure accurate temperature
- Maintain a consistent baking environment
Proper Spreading Techniques
How you spread the granola mixture is important. Press it firmly into an even layer on the baking sheet. This helps clusters form.
- Use parchment paper for easy removal
- Spread granola in a thin, even layer
- Avoid overcrowding the baking sheet
The Crucial Cooling Process
Patience is key for perfect crunchy granola. Let it cool completely before breaking it into clusters. This step lets the ingredients set and become crunchy.
- Let granola cool for at least 45 minutes
- Do not stir while cooling
- Break into clusters only after complete cooling
With these tips, your homemade crunchy granola will be as good as store-bought. Remember, practice makes perfect. Each batch will bring you closer to granola greatness!
Flavor Variations and Add-ins

Making your own granola is a fun adventure! You can change up your vanilla nut granola recipe with easy swaps and add-ins. This makes your breakfast recipe special and unique.
Here are some cool ways to make your granola stand out:
- Nut Variations:
- Pecans for a rich, buttery flavor
- Walnuts for extra omega-3 nutrients
- Almonds for a classic crunch
- Seed Boosters:
- Pumpkin seeds for zinc
- Sunflower seeds for vitamin E
- Chia seeds for added protein
Dried fruits add amazing flavor to your homemade granola. Try these:
- Cranberries for tartness
- Blueberries for antioxidants
- Raisins for natural sweetness
Spice lovers can add unique flavors. Try these:
- Nutmeg for warmth
- Ginger for zest
- Cardamom for complexity
| Flavor Category | Recommended Add-ins | Flavor Profile |
|---|---|---|
| Tropical | Coconut flakes, dried mango | Sweet, exotic |
| Chocolate Lover’s | Dark chocolate chips, cocoa powder | Rich, decadent |
| Savory | Rosemary, sea salt | Herbal, sophisticated |
The best thing about homemade granola is how versatile it is. Feel free to try new things and find your favorite mix!
Storage and Shelf Life
Keeping your homemade breakfast meal prep granola fresh is key. The right storage methods help keep it crunchy and flavorful. This way, you can enjoy it for longer.
When you’re ready to store your granola, pick the right container. An airtight one is best. It keeps moisture and air out, which helps your granola stay fresh.
Optimal Container Selection
Look for containers that fit these criteria:
- Glass jars with tight-sealing lids
- Ceramic containers with rubber gaskets
- Heavy-duty plastic containers with snap-lock mechanisms
Environmental Considerations for Granola Preservation
Your homemade granola does best in certain conditions. Store it in a cool, dry spot. Avoid direct sunlight and heat. A pantry or kitchen cabinet is ideal.
For longer storage, try these:
- Room Temperature: Up to 2-3 weeks in an airtight container
- Refrigerator: Up to 1 month
- Freezer: Up to 3 months
Tip for meal prep fans: Freeze your granola in small portions. It’s easier to thaw and keeps fresh longer.
Serving Suggestions and Pairings
Your homemade vanilla nut granola recipe is perfect for making healthy breakfasts. It turns simple meals into amazing dishes.
Here are some fun ways to enjoy your vanilla nut granola:
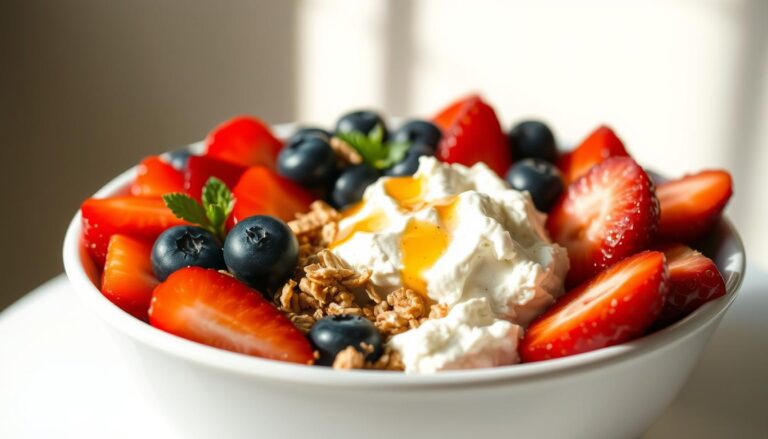
- Breakfast Bowls: Sprinkle over Greek yogurt with fresh berries
- Smoothie Topping: Add crunch to your morning smoothie bowl
- Snack Time: Enjoy as a standalone crunchy snack
- Dessert Enhancer: Garnish ice cream or puddings
Looking for the best breakfast pairings? Try these:
| Pairing Option | Nutritional Benefit |
|---|---|
| Almond Milk | Low-calorie, vitamin E rich |
| Greek Yogurt | High protein, probiotics |
| Fresh Berries | Antioxidant boost |
Pro tip: Your vanilla nut granola adds exceptional texture to dishes. Try different pairings to find your favorite!
“Granola isn’t just a food, it’s a canvas for culinary creativity.” – Nutrition Expert
Keep your granola fresh by storing it in an airtight container for up to a month. This way, you’ll always have a crunchy snack ready for your breakfast.
Nutritional Information and Dietary Considerations
Your homemade gluten-free granola is more than just a tasty treat. It’s a healthy breakfast recipe that boosts your wellness. Knowing its nutritional profile helps you make better food choices.
A typical serving of granola (about 1/2 cup) offers great nutritional benefits:
- Calories: 200-300
- Protein: 6-10 grams
- Fiber: 3-5 grams
- Healthy Fats: 5-10 grams
When making your gluten-free granola, choose ingredients that are nutritious. Use certified gluten-free oats for safety. Nuts and seeds add protein, healthy fats, and minerals.
“Portion control is key with granola due to its calorie density,” nutrition experts recommend.
To make a truly healthy breakfast, aim for granola with:
- Less than 5 grams of added sugar per serving
- At least 3-5 grams of fiber
- Protein content around 6-7 grams
Pro tip: Homemade granola lets you control what goes into it, making it better for those with dietary needs.
By understanding these nutritional tips, you can turn your gluten-free granola into a health and flavor powerhouse.
Troubleshooting Common Granola Problems

Making the perfect easy granola recipe can be tricky. Even experienced bakers face challenges. Knowing common issues helps you get that crisp texture every time.
Let’s look at some typical problems you might face:
- Soggy Granola: Too much liquid or a low baking temperature can cause this.
- Burned Edges: Uneven heating can burn some parts while others stay undercooked.
- Lack of Clusters: Proper binding and minimal stirring are key for clusters.
To solve these issues, follow these expert tips:
- Keep the baking temperature between 300°F and 325°F.
- Use 1/4 to 1/2 cup of liquid sweetener per 3 cups of oats.
- Press the granola mixture firmly on the baking sheet.
- Minimize stirring during baking to preserve clusters.
- Allow granola to cool completely for maximum crunchiness.
If your crunchy granola loses its texture, re-bake at 300°F for 5-7 minutes. Store in an airtight container to keep it fresh for up to two weeks.
Remember, practice makes perfect. Each batch of granola is a chance to improve your technique and make a delicious, nutritious snack.
Conclusion
Making your own homemade granola is more than just cooking. It’s a way to eat healthier and tastier. The vanilla nut granola recipe you’ve learned is a great mix of nutrition and flavor. You get to choose what goes into it, making it free from bad stuff and full of good stuff.
Your homemade granola can change how you start your day and snack time. You can add different nuts, seeds, or spices to make each batch special. This recipe is flexible, so you can make it fit your diet, whether it’s gluten-free, plant-based, or high-protein.
Enjoy making your own granola. It’s cheaper than buying it and more rewarding because you made it. Your kitchen will smell amazing, thanks to the toasted nuts and vanilla. Homemade granola is a wonderful thing to add to your cooking.
Remember, cooking is all about trying new things and having fun. Start with this vanilla nut granola recipe. Let your creativity lead you to even more tasty creations.